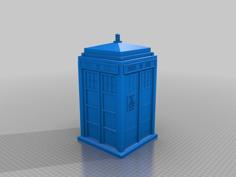
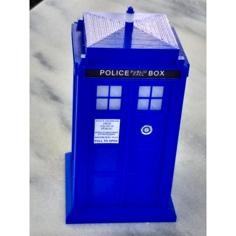
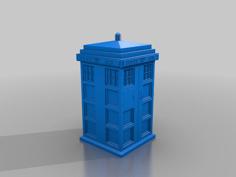
3rd Doctor Brachaki Altered TARDIS 5.5 Inch Scale 3D Printer Model
The file '3rd Doctor Brachaki Altered TARDIS 5.5 Inch Scale 3D Printer Model' is (stl) file type, size is 32.7MB.
The file '3rd Doctor Brachaki Altered TARDIS 5.5 Inch Scale 3D Printer Model' is (stl) file type, size is 32.7MB.
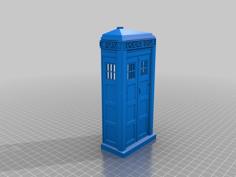
In the file are 3 different versions. If you print all of the parts included not labelled as 5th Variation or 7th variation, you'll have a complete Brachaki Altered TARDIS 6th variation, as seen in The Three Doctors to Planet of the Spiders.
If you want to print either of the other versions, just swap out the one ordinary version with the corresponding unlabeled part. (e.g. Print "Brachaki TARDIS Altered 7th Variation Right Door" instead of "Brachaki TARDIS Altered Right Door"). If you're printing the 4th Doctor's, the only variant part is the right door with the new lock.
The Lamp with a missing strut was first seen in Invasion of the Dinosaurs. If printed, the missing strut should face the back-right corner of the box (if you were looking at it head-on). The lamp with dome-less housing was used for Death to the Daleks - The Monster of Peladon. All subsequent stories used the housing-less version of the lamp. The "5th Variation Windows" file features one window with only two panes of pebbled glass. This window should be in the left-hand side (looking at the box straight on) in the one nearest to the doors. It remained there until Carnival of Monsters.
For the clear parts, I recommend printing at 100% infill, and in the case of the lamps, printing with a brim instead of a skirt. The two lamps with the dome on top of the housing will also need support.
After printing make sure to paint the insides of all parts of the box black BEFORE assembling it. If you printed the version with the clear top signs, put those in before assembly too, because it will be impossible to get to them afterwards. You should glue the images for the clear signs on first since it will be easier to get them in now. Also put all the windows in each door/wall at this point, provided you're done painting the insides parts black. I also recommend painting the insides of the windows with yellow glass paint, which will give a transparent effect, but not be as bright as if you painted it on the outsides.
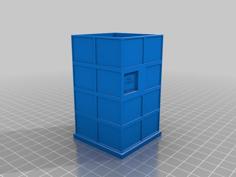
After that, slide the walls into the grooves in the poles, then put the doors in. The walls are labeled left and right in the files as if you were looking head-on at the box, so double check you have them both the right way around.
The rear wall prints super thin, and will in all likelihood rip as you get it off the printbed. Even if it didn't, it will still let light through, which is why there's a file called "rear wall backing." Just glue it on with super glue and make sure it doesn't go below the wall itself, or the base won't be able to attach.
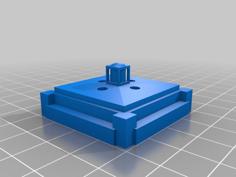
Now put the base in, and make sure both axles for the doors are aligned. You'll probably have to use a hammer and hit it a couple times until it goes into place. Try to hit each corner enough so the base stays even as it first goes in, otherwise it can't fit in the holes.
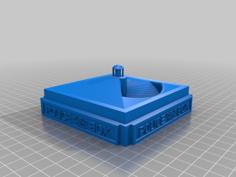
Then put the tiny cube called "alignment cube" into the top of the poles, and hit it with a hammer until it's in place. Then put the roof on, and press it on as hard as your can. If that doesn't work, you can give it a couple whacks with a hammer until it's completely in, or try and sand it down and see if it fits better.
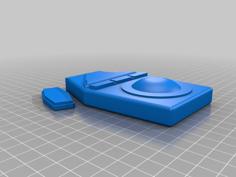
Then put the lamp in, and paint it. The lamp on my version is a perfect fit and can be swapped out easily at any time, while also not being so loose it'll come out on its own. So you can probably swap lamps out as you desire without having to worry.
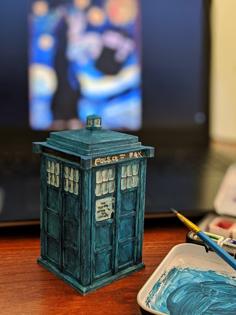
Then do any sanding/improvements you want to make to the parts, and start painting. I recommend putting the first layer of primer on super thick, so you can kind of achieve that chunky look the prop had. Then paint it with a darker undercoat of blue, paint over that with the actual correct blue, and then drybrush some dirt-colored weathering on.
After painting, cut out the signs carefully, and use whatever adhesive you choose to get them on. Personally I used a glue and it works perfect. You should also apply another coat of weathering to the signs just to make them look like part of the box instead of just printed out.
| Brachaki_TARDIS_Altered_5th_Variation_Left_Wall.stl | 9.3KB | |
| Brachaki_TARDIS_Altered_5th_Variation_Right_Wall.stl | 9.8KB | |
| Brachaki_TARDIS_Altered_5th_Variation_Windows.stl | 34.2MB | |
| Brachaki_TARDIS_Altered_7th_Variation_Right_Door.stl | 731.1KB | |
| Brachaki_TARDIS_Altered_Alignment_Cube.stl | 684.0B | |
| Brachaki_TARDIS_Altered_Back_Rear_Wall.stl | 11.2KB | |
| Brachaki_TARDIS_Altered_Base.stl | 289.2KB | |
| Brachaki_TARDIS_Altered_Clear_Sign.stl | 684.0B | |
| Brachaki_TARDIS_Altered_Handle_Currently_non-functioning.stl | 107.7KB | |
| Brachaki_TARDIS_Altered_Lamp.stl | 681.5KB | |
| Brachaki_TARDIS_Altered_Lamp_Damaged_Housing.stl | 437.9KB | |
| Brachaki_TARDIS_Altered_Lamp_Missing_Strut.stl | 581.1KB | |
| Brachaki_TARDIS_Altered_Lamp_No_Housing.stl | 285.4KB | |
| Brachaki_TARDIS_Altered_Left_Door.stl | 223.4KB | |
| Brachaki_TARDIS_Altered_Left_Wall.stl | 9.3KB | |
| Brachaki_TARDIS_Altered_Poles.stl | 1.2MB | |
| Brachaki_TARDIS_Altered_Poles_Clear_Signbox_version.stl | 1.2MB | |
| Brachaki_TARDIS_Altered_Rear_Wall_Backing.stl | 684.0B | |
| Brachaki_TARDIS_Altered_Right_Door.stl | 805.4KB | |
| Brachaki_TARDIS_Altered_Right_Wall.stl | 10.5KB | |
| Brachaki_TARDIS_Altered_Roof.stl | 143.3KB | |
| Brachaki_TARDIS_Altered_Windows.stl | 41.2MB |