The file '3D Printer Electronics Enclosure – Touch Screen, Mainboard, MOSFET, PSU, Raspberry, Fan. 3D Printer Model' is (f3d,iges,stl) file type, size is 8.9MB.
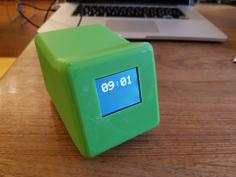
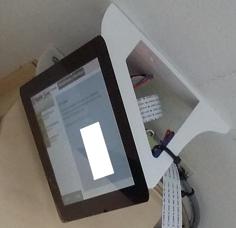
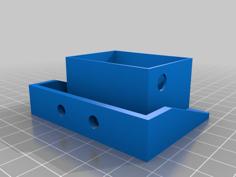
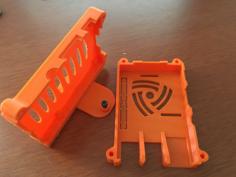
This is an electronics box/enclosure witch also has a touch screen for octoprint.
Designed for Anet A8 But should be able to suit most printers.
If you make one I would really like to see it.
ATX PSU Remix:
https://www.thingiverse.com/thing:2829053
No Touch Screen Remix:
https://www.thingiverse.com/thing:2829157
RepRap Full Graphic Smart Controller Remix:
https://www.thingiverse.com/thing:2857158
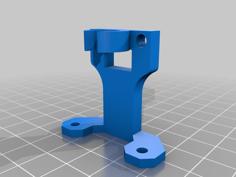
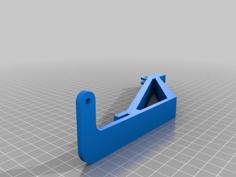
Camera mount I use:
https://www.thingiverse.com/thing:2008595
also made another axis for that mount for the mount:
https://www.thingiverse.com/thing:2755684
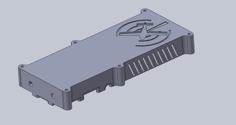
UPDATE: 05/05/2018
Adde Atroprint Back lid.
https://www.thingiverse.com/thing:2894255
UPDATE:02/03/2018
Added "f3d" & "iges" files for those of you who wish to modify for them selves.
If you add support for other boards, screens or anything else and want to share it let me know and i can add to this thing for everyone.
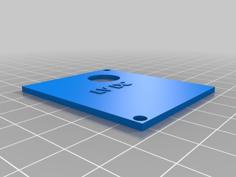
UPDATE:01/02/2018
Added a lid that supports the Anet A6 12864 LCD.
This is currently unverified as I do not have this screen to test it. Will update once someone has printed it.
(This does not have outline feature)
7 inch HD Touch Screen Display LCD 1024x600 HDMI Module Kit Set For Raspberry BS:
https://www.ebay.com/itm/New-7-Capacitive-Touch-Screen-LCD-Display-IPS-1024x600-HDMI-For-Raspberry-Pi-/381182253906
30 Amp 12 Volt DC 13.8V Regulated Switching Power Supply:
https://www.ebay.com.au/itm/LETOUR-12V-30A-DC-Power-Supply-360W-AC-110V-220V-Converter-DC-12Volt-30Amp-360Wa/332577891025?hash=item4d6f2fe2d1:g:qFsAAOSwIa9anwo2
IEC Fuse Chassis Male Power Plug with Switch:
https://www.ebay.com.au/itm/NEW-IEC-Fuse-Chassis-Male-Power-Plug-with-Switch-PP4003/252985807193?epid=904172097&hash=item3ae7211159:g:JAcAAOSw62VZxPNQ
Raspberry Pi 3 Model B - Premium NOOBS Pack:
https://www.ebay.com.au/itm/Raspberry-Pi-3-Model-B-Premium-NOOBS-Pack-16GB-USB-Switch-2-5A-Power-Supply/201385350646?hash=item2ee38095f6:g:yJUAAOSwLEtYlUV6
M3 M4 M5 Hex Socket Screws Set (Only uses M3 ans M4 for PSU)
https://www.ebay.com.au/itm/440pc-M3-M4-M5-Hex-Socket-Screws-Set-Stainless-Steel-Screws-and-Nuts-Repair-Tool/292191840569?hash=item4407fda939:g:FP4AAOSwTLxZhZLo
0.5m USB 2.0 A To RIGHT ANGLE MICRO B (Power for screen from Raspberry + it's the touch input):
https://www.ebay.com.au/itm/0-5m-USB-2-0-A-To-RIGHT-ANGLE-MICRO-B-Data-Charging-Cable-50cm-Lead-007239/382268609416?epid=1630600552&hash=item5900fc1388:g:n94AAOSw-jFaHdPI
50cm USB A to B CABLE - Printer Scanner Cord (50cm seems to be the smallest cables go):
https://www.ebay.com.au/itm/50cm-USB-A-to-B-CABLE-Printer-Scanner-Cord-Lead-Wire-Modem-USB-2-0-NEW-Short-/322968937423?
50cm HDMI CABLE (50cm seems to be the smallest cables go)
https://www.ebay.com.au/itm/Premium-50cm-HDMI-Cable-Ultra-HD-4K-2160p-1080p-3D-High-Speed-Ethernet-ARC-HEC/112200848129?hash=item1a1fb11301:m:m3padqnjX2-TgGidintUHhA
HDMI Right Angle Male To Female 90-180 Degree (This is required because the space to plug into the screen is tight so the plastic case on this adapter needed to be removed to fit. I then covered it in heat shrink tubing.
https://www.ebay.com.au/itm/HDMI-Right-Angle-Male-To-Female-90-180-Degree-Adapter-Cable-Lead-Connector-BDAU/362151940118?epid=2251233935&hash=item5451f01016:g:SSQAAOSwAO9ZSdwh
PUSH ON PUSH OFF BUTTON SQUARE:
https://www.ebay.com.au/itm/2X-SPST-PUSH-ON-PUSH-OFF-BUTTON-SQUARE-SWITCH-BLACK/282348515537?hash=item41bd4870d1:g:1bkAAOSwCU1Y304D
SD to Micro SD Card Extension Cable Extender Adapter x2:
https://www.ebay.com.au/itm/SD-to-Micro-SD-Card-Extension-Cable-Extender-Adapter-SDHC-For-Car-GPS-TV-CN-48cm/131978779662?epid=503010732&hash=item1eba8c5c0e:g:N2EAAOSw609Z32Jq
Not that much to it really.
Infill and layer height are all up to the person printing.
All parts are laid out the way I printed them, feel free to position how you want.
All parts are able to fit on a 220x220 build plate.
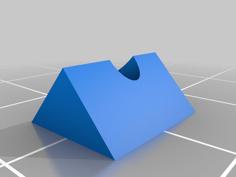
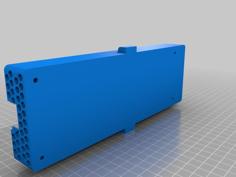
Print out main body parts, glue or plastic weld together or how ever you want to join them.
The Lid and Front Panel parts get screwed on.
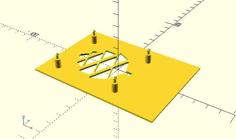
Outline effect.
If it's to confusing you don't have to do it just ignore all the FIRST LAYER ONLY files.
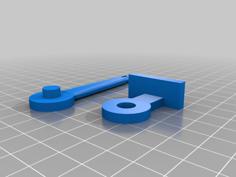
To get the outline of the Octoprint logo and edges in a different color print the part with the "First Layer Only" first don't remove from build plate then print the whole piece on top of it.
Same go's with the Anet logo.
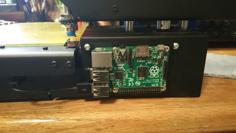
Raspberry mounts on the under side of the back lid.
I followed this guide to get all working:
https://github.com/BillyBlaze/OctoPrint-TouchUI/wiki/Setup:-Boot-to-Browser-(Jessie-Full)
3D_Printer_Enclosure.f3d | 2.3MB | |
3D_Printer_Enclosure.iges | 20.3MB | |
Front_Panel.stl | 99.8KB | |
Front_Panel_Anet_Logo_First_Layer_Only.stl | 483.5KB | |
Front_Panel_RepRapDiscount_Full_Graphic_Smart_Controller.stl | 219.4KB | |
Lid_Back.stl | 5.0MB | |
Lid_Back_Octoprint_Logo_First_Layer_Only.stl | 1.1MB | |
Lid_Back_Plain.stl | 23.1KB | |
Lid_Front.stl | 174.4KB | |
Lid_Front_Anet_12864_LCD.stl | 219.6KB | |
Lid_Front_Outline_First_Layer_Only.stl | 543.1KB | |
Main_Body_Back.stl | 1.0MB | |
Main_Body_Front.stl | 317.0KB | |
Main_Body_Middle.stl | 335.0KB |