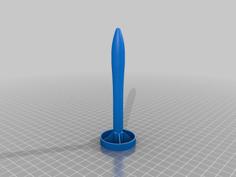
2 Liter Water Rocket Kit W/ Parachute 3D Printer Model
The file '2 Liter Water Rocket Kit W/ Parachute 3D Printer Model' is (stl) file type, size is 601.3KB.
The file '2 Liter Water Rocket Kit W/ Parachute 3D Printer Model' is (stl) file type, size is 601.3KB.
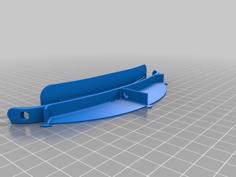
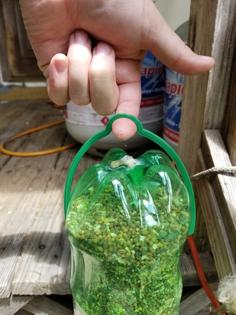
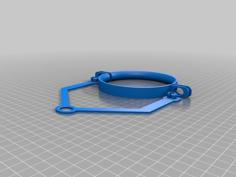
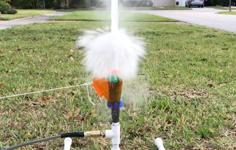
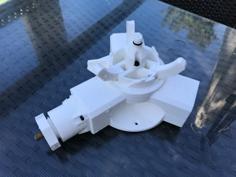
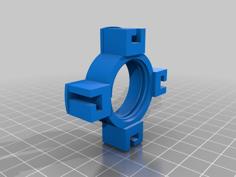
Some educational programs do water rocket projects that require the use of a parachute for recovery, where the result is measured by "hang time", or total time from launch to landing. Also these projects may get a lower grade if anything "hazardous" occurs during the flight (ie parts freefalling for recovery, uncontrolled trajectory, etc). In addition there is typically a need to execute multiple launches to try and improve performance with things learned from the previous launches. This thing was designed for this specific mission, using commonly found 2L soda bottles. There are integrated mounting loops to attach string/fishing line to the top mount and nose cone, and the parts should all be thick enough to survive most botched recoveries.
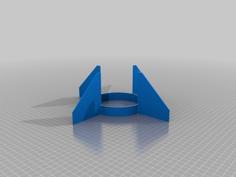
Print one of each part in the lightest filament possible. No supports are necessary. The wall thicknesses are optimized for 0.45mm wide printed lines, but they can also be printed at other widths. I printed with 0.3mm layers using ABS. I was able to fit both the top mount and the cone on my 220x220mm print bed, but more than likely unless you have a huge printer the fins will have to be printed separately.
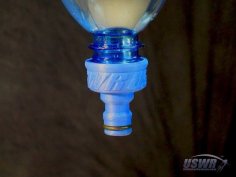
The top mount and fins are simply glued to the bottle using silicone sealant. The parts intentionally have a loose fit over the bottle, to give room for expansion when the bottle is filled with pressurized air. Use the minimum glue required to minimize weight. A few well placed dollaps should be fine; the gap doesn't need to be packed fully with glue. In fact it's a good idea to leave some "air gaps" in the gluing area to allow for more expansion as the bottle is inflated (using too much glue may result in parts cracking during inflation).
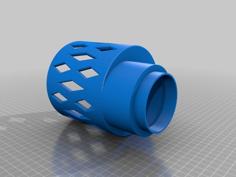
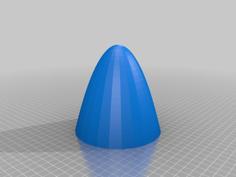
There are many ways to make a working parachute, but I recommend sticking with ripstop nylon and lightweight mono fishing line for a more reliable deployment. An approximately 2' long string should be tied between the top mount and the cone (preferrably more flexible line, like light bungee cord or very light mono filament for this). Burn or cut 6 small holes evenly around the edge of a ~3' diameter round cut parachute, and tie 6 equal length lines between each of the holes and one of the nose cone anchor points. The 6 chute lines can be a less flexible material (braided fishing line is good).
For flight, pack the chute loosely into the nose cone, and slide the nosecone onto the top mount. The cone should be a very loose fit for proper deployment. So care must be taken that the chute is packed in a way that doesn't push the cone off before flight. If the cone is fully seated before launch, acceleration and aero forces should hold it on until it reaches the top of it's trajectory where it slows down and starts to tumble. You can try scaling up the cone in the Z direction if more room is needed for your chute.
On a side note... I recommend googling for some info on how to do it properly if you aren't familiar. An improperly packed chute may get tangled up and not fully deploy.
| waterRocketCone.stl | 368.6KB | |
| waterRocketFinsB.stl | 258.3KB | |
| waterRocketTopMount.stl | 912.3KB |